Have you ever observed that your blog or any other blog which you are trying to open stopped responding. This situation is commonly known as server downtime. In this case, the blog or any web page is temporarily unavailable to the user. This can happens with anyone's blog and there is no time when it will going to happen. You can't sit 24 hours in front of your blog to check when it will going to happen again. All this crates a bad experience to the user and also if this happens frequently, then you blog's reputation is on stake.
There are so many disadvantages of server downtime. Some of them are listed below.
There are so many disadvantages of server downtime. Some of them are listed below.
- Your blog will start to lose traffic because visitors will get annoyed of it and don't want to come again
- Bounce rate of your blog will be increased
- Your google rank will get affected because search engines don't like websites having frequent downtime
- Your earning will be decreased
Although, blogger is a google property and it rarely goes downtime. But, using certain third party plugins can affect your blog to go downtime. In this post, I will show you a way by which you can easily monitor your blog and you will came to know when your blog server goes downtime and you will also get the reason behind it.
How To Monitor Server Uptime And Downtime In Blogger Blog
Site24*7 is a website which helps to monitor the uptime and downtime of any website. You can use this to monitor your blog and you will get notifications when your blog server goes downtime. You can decide the monitoring frequency and it can check for every seconds your website. Whenever there is any downtime, you will get an email regarding it.
To use this amazing service for your blog also, simply follow these simple steps.
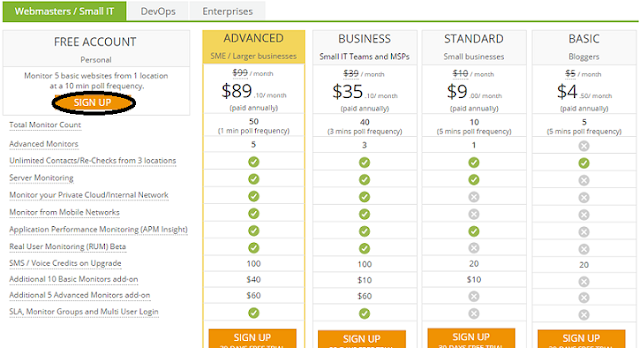
Step 1 : Go to http://www.site24x7.com/site24x7-pricing.html and sign up for a free account as shown below. You can choose other paid plans if you wish.
Step 2 : Fill the details about you for sign up or you can also use Facebook, Google or Yahoo account to sign up.
Step 3 : Now, login to your account and go to 'Admin' section and select Add monitor.
Step 4 : Now fill the required details as shown below.
Display Name - Write a name for you campaign so you can remember it in future.
Website address - Write the URL of your blog or website.
Check Frequency - Select the frequency for your website check. Select it 10 minutes if you are using a free account.
Keep other thing unchanged and Save the settings.
Congrats !! now you're up and running. Site24*7 will start monitoring right away.
I hope you liked this tutorial in monitoring your blogs server uptime and downtime.
If you have any question then feel free to ask.


