Saturday, 16 May 2015

// // Leave a Comment

How To Install Google Fonts On Blogger Blog

Nowadays, people are not using the same fonts given by blogger. They just trying to customize their blog in every aspect and the font is one of them. We can easily use our desired fonts on our blog's titles and body content. You can easily host your fonts on a server by paying a decent amount. You can also use some free services like Google Fonts to make your blog's fonts beautiful.

How To Install Google Fonts On Blogger Blog


Google fonts is the largest font's inventory. It has thousands of different fonts and the implementation is also very easy. In this post, I will show you how can install a Google Font on your blogger blog. Follow the steps given below and start using the attractive Google Fonts on your blog without spending a penny.

How To Install Google Fonts On Blogger Blog

Step 1 : Go to Google Fonts and you will be able to see the free inventory of web fonts. Take your time and look for the best font for your requirement. You can write a sample text and see how it looks. 
How To Install Google Fonts On Blogger Blog

Step 2 : After selecting your favorite font style, click on 'Quick Use' button and proceed to next step.
How To Install Google Fonts On Blogger Blog


Step 3 : Now choose the size of the font according to the need of your blog. You can choose more than one options but this will decrease the page speed of your blog. There is also a page speed meter shown on the right part of the page. Try to be in the green part of it.

How To Install Google Fonts On Blogger Blog


Step 4 : Now scroll down the page and you will see a link. Copy the link in a notepad file and proceed to next step.

How To Install Google Fonts On Blogger Blog


Step 5 : Open your blogger account. Go to 'Template' and edit the template in HTML form. Search for </head> and paste the copied code just above it.
Remember, you have to put </link> after the copied text to close the <link> tag.


Step 6 : To use the font, you have to integrate it with your CSS
How To Install Google Fonts On Blogger Blog

1. If you want to implement it on your title, the you will use the following code-
    .post-title {font-family: 'FONT NAME'; } 

2. If you want to implement it on your post body, then you will use the following code-
   .post-body {font-family: 'FONT NAME'; }

3. If you don't want to implement the font style on a certain portion of your text, the use the following code - 
   <span style="font-family: FONT NAME;">Your-Text-Here</span>

After successfully going over the above steps, you will have your desired font style on your blog.

I hope this tutorial helped you to install your preferred font style on your blogger blog. If you faced any difficulty in using it, then feel free to ask in the comments below.
Read More

Thursday, 14 May 2015

// // Leave a Comment

How To Use Google Disavow Link Tool To Remove Spam

Many webmasters regularly face the problem of spam links on their website. You may have also discovered unnatural linking of your website on different sites and directories. It is important for us to remove those links as to protect our content and prevent our website from losing its rank.

How To Use Google Disavow Link Tool To Remove Spam


You can spent days on removing spam links and still you might facing some problem to remove some of those spams. Google introduced a tool which helps to remove any kind of spam link. They named the tool as 'Disavow Tool'. This tool will help webmasters to remove those spammy links which are linking to your website. By using this tool, you are informing the search engines that they should not count those link which are from a unwanted source. In this post, I will show you how you can use this tool to remove the spams from your website.

How To Use Google Disavow Link Tool To Remove Spam

  • Go to Google Disavow Tool
  • Now, you will see the list of your websites which you already verified on google webmasters tool. Select the one out of them from which you wants to remove spam. Click on 'Disavow button'.

How To Use Google Disavow Link Tool To Remove Spam

Note : This is an advanced feature and should only be used with caution. If used incorrectly, this feature can potentially harm your site's performance in Google's search results. We recommend that you only disavow backlinks if you believe that there are a considerable number of spammy, artificial, or low-quality links pointing to your site, and if you are confident that the links are causing issues for you.


  • Now, you have to upload a text file containing the those links which you wants to remove. Given below is a example of it.
http://spammedlinks2.com/here-is-spam-links.html
http://spammedlinks2.com/spam-is-bad.html
http://spammedlinks2.com/another-spam-link-database.html

Write the links in a notepad file and save it to your hard disk. Now upload the file on this tool as shown below.

How To Use Google Disavow Link Tool To Remove Spam


  • Click on submit button and you are done with it.

Use this tool only when you are unable to handle the spammy links on your own. As mentioned above, this tool is not for everyone. So, use it very carefully. 

Read More

Saturday, 9 May 2015

// // Leave a Comment

How To Monitor Server Uptime And Downtime In Blogger Blog

Have you ever observed that your blog or any other blog which you are trying to open stopped responding. This situation is commonly known as server downtime. In this case, the blog or any web page is temporarily unavailable to the user. This can happens with anyone's blog and there is no time when it will going to happen. You can't sit 24 hours in front of your blog to check when it will going to happen again. All this crates a bad experience to the user and also if this happens frequently, then you blog's reputation is on stake.

How To Monitor Server Uptime And Downtime In Blogger Blog


There are so many disadvantages of server downtime. Some of them are listed below.

  • Your blog will start to lose traffic because visitors will get annoyed of it and don't want to come again
  • Bounce rate of your blog will be increased
  • Your google rank will get affected because search engines don't like websites having frequent downtime
  • Your earning will be decreased

Although, blogger is a google property and it rarely goes downtime. But, using certain third party plugins can affect your blog to go downtime. In this post, I will show you a way by which you can easily monitor your blog and you will came to know when your blog server goes downtime and you will also get the reason behind it.

How To Monitor Server Uptime And Downtime In Blogger Blog

Site24*7 is a website which helps to monitor the uptime and downtime of any website. You can use this to monitor your blog and you will get notifications when your blog server goes downtime. You can decide the monitoring frequency and it can check for every seconds your website. Whenever there is any downtime, you will get an email regarding it.

To use this amazing service for your blog also, simply follow these simple steps.

Step 1 : Go to http://www.site24x7.com/site24x7-pricing.html and sign up for a free account as shown below. You can choose other paid plans if you wish.

How To Monitor Server Uptime And Downtime In Blogger Blog


Step 2 : Fill the details about you for sign up or you can also use Facebook, Google or Yahoo account to sign up.

How To Monitor Server Uptime And Downtime In Blogger Blog

Step 3 : Now, login to your account and go to 'Admin' section and select Add monitor.

How To Monitor Server Uptime And Downtime In Blogger Blog


Step 4 : Now fill the required details as shown below.

Display Name - Write a name for you campaign so you can remember it in future.
Website address - Write the URL of your blog or website.
Check Frequency - Select the frequency for your website check. Select it 10 minutes if you are using a free account.

How To Monitor Server Uptime And Downtime In Blogger Blog

Keep other thing unchanged and Save the settings.

Congrats !! now you're up and running. Site24*7 will start monitoring right away.

I hope you liked this tutorial in monitoring your blogs server uptime and downtime.
If you have any question then feel free to ask.
Read More

Tuesday, 5 May 2015

// // Leave a Comment

How To Add a Forum To Your Blogger Blog

A forum is a platform where everyone can put their opinions, ask questions, reply to someone's query or just participate in a discussion. It is always good to have a forum in your website or blog. It gives your user a way to interact with you and other users of the same website. Also, they have more chances of getting their question answered.

Although, users can also interact through comments but, asking a question in a comment which is not related to that post, feels awkward. So a forum gives them the freedom to start a whole new conversation.

How To Add a Forum To Your Blogger Blog


Adding a forum in a blogger blog is a tough task. Blogger is a free platform so it lacks of so many features. But, we can still add a forum to our blog using Google Groups. Google Group provides you with a free forum with high flexibility. It's a free tool and you can customize it any time very easily. In this post, I will show how to add Google Group forum to your blog. Follow these steps carefully.

Add a Forum To Your Blogger Blog

Step 1 : First, you have to log in to your gmail account. Now, go to https://groups.google.com/forum/?fromgroups#!myforums and click on 'Create Group' as shown below.

How To Add a Forum To Your Blogger Blog

Step 2 : Now, you will see a form. Fill the the required details. All the points are explained below.

How To Add a Forum To Your Blogger Blog

Group name : Write a name for your new forum. It will be good to choose a name related to your subject. You can also rename it any time.

Group email address : A group email address will be created automatically according to the group name. For example, if you write "Marketing" in the group name then you will be provided with marketing@googlegroups.com as group email address.

Group description : Write a small description about your forum so that the visitor could understand about it.

Group's primary language : Select the language for your forum according to you. Most of the people select the English and it is by default selected English only.

Group type : This option you have to select according to your need. You will get four options i.e Email list, Q&A Forum, Web Forum, Collaborative inbox. Depending on your requirement , select the one out of four.

Basic permission : In this section, you have to decide the basic permissions about your forum which you want to give to your users.

Once you filled all the information correctly, click 'Create' button. Now your group is successfully created.


Step 3 :  Now open your blogger account. Go to Pages and create a new page. Edit the Page in HTML form.

How To Add a Forum To Your Blogger Blog

Step 4 : Now copy and paste the following code there.
             <iframe frameborder="0" height="1000px" id="forum_embed" scrolling="no"
src="javascript:void(0)" width="100%">
    <br />
</iframe>
<script type="text/javascript">
    document.getElementById("forum_embed").src =
        "https://groups.google.com/forum/embed/?place=forum/yourgroupname" +
        "&showsearch=true&showpopout=false&parenturl=" + encodeURIComponent(window.location.href);
</script>

Replace yourgroupname with the name of your group.


Step 5 : Publish the page and you are done with it.

Congrats !! You have successfully created and added a forum to your blog.

I hope this tutorial helped you to add forum to your blog/website. If you faced any difficulty in doing it, then feel free to ask in the comments below.

Read More

Saturday, 2 May 2015

// // Leave a Comment

How To Embed Powerpoint Presentation In Your Blog Post

You always try to write your content in the best way so that your users can get the most our of it. There are so many other ways by which you can improve your content quality. You can add Video, graphs, pictures etc. One of the similar method to give more information to your readers is to embed a power point presentation in your post. A power point presentation gives your readers so much information in a beautiful way and it also makes your blog more professional.

How To Embed Powerpoint Presentation In Your Blog Post


In this post, I will show you how to embed a PowerPoint presentation your blog post. Follow the steps given below carefully.

Add/Embed PowerPoint Presentation In Your Blog Post

Step 1 : First of all, you have to create a account at SlideShare. Go to https://www.slideshare.net/signup and fill some simple details. You can also sign up with your Facebook or Linkedln account. 

How To Embed Powerpoint Presentation In Your Blog Post

Step 2 : After successfully completing your sign up process, click on Upload button on the top right part of web page and upload your PowerPoint presentation.
Fill all the details of that presentation and make it public.

Step 3 : After uploading your presentation, go to 'My Uploads' section and select your uploaded PowerPoint.

How To Embed Powerpoint Presentation In Your Blog Post


Step 4 : Now, go to that file and click on share button. Now you will find more than 1 code. Copy the 'Embed' code as shown below.

How To Embed Powerpoint Presentation In Your Blog Post


Step 5 : Now go to your blogger account. Go to Post section and edit the post or create new post. Edit the post in HTML form and paste that code there.

How To Embed Powerpoint Presentation In Your Blog Post

Step 6 : Complete your post and publish it. That's it. You have successfully embed your PowerPoint presentation in your post.


I hope this tutorial helped you to embed your PowerPoint presentation in your blog's post. You have any problem using it then feel free to ask below in the comments.

Read More

Thursday, 30 April 2015

// // Leave a Comment

How To Embed Audio Clips In Your Blogger Blog

Have you ever thought of adding a audio clip in your posts. Many times you have seen a YouTube videos between the content of a post. It's very common thing to embed a YouTube in your post. But, adding a audio clip is a new thing to most of the bloggers.

Adding a audio clip have so many uses. You can give a introduction about your blog in a small audio or you can start a series of audio episodes related to any topic using the same technique. This will help you to get more subscribers and helps you to increase your blog traffic and ranking. It is very useful and also it is easier to make a audio clip than a video, if you are producing it on your own.

Embed Audio Clips In Your Blogger Blog


In this post, I will show you how you can embed a audio file in your post. Here we will be using SoundCloud to host your audio files. Follow the steps given below.

Embed Audio Clip In Your Blog Post

Step 1 : First, you have to create a account at SoundCloud. Sign up at SoundCloud by filling some few details. You can also use your gmail or Facebook account to sign up.

Embed Audio Clips In Your Blogger Blog

Step 2 : Now, after creating your account, go to https://soundcloud.com/upload and click on 'Choose files to upload'.

Embed Audio Clips In Your Blogger Blog

Step 3 : Now upload the file and fill the necessary information as shown below.

Embed Audio Clips In Your Blogger Blog
Write the title of your audio and add some tags related to it. Add a description of your audio if you want and also add a image. Now make your audio public so that everyone can see it. Click on Save button.

Step 4 : Now, after successfully uploading your audio go to your account and look for that uploaded file. Look for the share button.
Embed Audio Clips In Your Blogger Blog

Click on this button and a new window will appear. Now go under 'Embed'.


Step 5 : Now copy the HTML code as shown below.

Embed Audio Clips In Your Blogger Blog


Step 6 : Now, go to your blogger account. Go to posts and edit the post in which you want to embed that audio. Now edit the post in HTML form and paste that copied code where you want it to appear.

Embed Audio Clips In Your Blogger Blog

Step 7 : Publish the post and you are done with it.

Congrats!! You have successfully embed a audio clip in your post.

I hope this tutorial helped you to add audio clip in your post. If you faced any problem then feel free to ask in the comments below. Don't forget to share this with your friends.
Read More
// // Leave a Comment

How To Add a Toluna Poll In Your Blogger Blog

Blogging is only successful when your blog is really helping the readers. You may think that you are producing a great content but, it is not you who judges the work of yourself. Your readers will decide how good your blog is.

As a blogger, it is your responsibility to interact with your readers, reply to their comment and solve their problems. You should reply to every mail from your readers. One of the best way to interact with your user is to add a poll in your blog. You can ask any question about your blog or any change you wants to bring in your blog. Readers will have options to choose from and it will give a good look of what they want you to do.


Add a Toluna Poll In Your Blogger Blog


In this post, I will show you how you can add a Toluna poll to your blog. You can customize it according to you, add as many options as you want. Follow these steps given below.

Add Toluna Poll In Your Blogger Blog

Step 1  : First, you have to create a account at Toluna. Click here  to create a new account. You can also sign up with your Facebook account.

Add a Toluna Poll In Your Blogger Blog

Step 2 : Confirm your email and login to your account. Now, its time to create your poll. Go to https://us.toluna.com/Recent/?create. You will see four options Poll, Topic, Thumb It and VS Battle out of which you have to select Poll.

Add a Toluna Poll In Your Blogger Blog


Step 3 : Now, as you can see in the above picture, you have to write your question or anything in place of 'Ask Something'. Write the answers in the space shown, you have to write at least 2 option to give choices to your users. To add more than 2 option, simply click the plus(+) sign.
Now, select a category of your question and click on Create button.


Step 4 : Now go to your profile and choose that created poll.Now find embed button as shown below.


Add a Toluna Poll In Your Blogger Blog


Step 5 : Now you will see a box as shown in the picture below. Customize the size of your poll and copy the code shown to you.
Add a Toluna Poll In Your Blogger Blog


Step 6 : Now, open your blogger account. Go to Layout>>Add a gadget>>HTML JavaScript and paste the copied code there.

Step 7 : Save the template and you are done with it.

Congrats!! You have successfully added a poll to your blog.

I hope this widget helps you to add a Toluna poll to your blog to interact with your readers. If you faced any problem then feel free to ask in the comments below.
Read More

Wednesday, 29 April 2015

// // Leave a Comment

How To Make Backup Of Images In Your Blogger Blog

Images are the most important part of any blog's content because without images the content will not be appreciated. Peoples don't like the articles without having pictures in it. So it is good to include images in your post.
The images which you upload on your blog are always hosted at Picasa Web album. Both, Blogger and Picasa belongs to Google and at any time when you knowingly or unknowingly violates their policy, they have the right to remove your blog and all its content. In such worse situation you cannot get all your content easily.It will take months to recover all.

Make Backup Of Images In Your Blogger Blog

So, it is better to make a backup of your blog. Here, in this post, I will show you how you can make a backup of your all images uploaded on your blog. Follow these steps carefully.

Make Backup of Your Blog's Images

Step 1 : Go to Google Takeout and select Google Photos from the list.

Make Backup Of Images In Your Blogger Blog


Step 2 : Now select the album of which you want to make backup. Simply select the name of your blog. You can also include all photo album.

Make Backup Of Images In Your Blogger Blog

Step 3 : Tick cancel to other remaining options.

Make Backup Of Images In Your Blogger Blog


Step 4 : Click Next button and then select the file the file type and delivery method shown to you.

Make Backup Of Images In Your Blogger Blog
 The default option is the best. You can easily download in zip format from the link send to you in your inbox. Click on create archive button.


Step 5 : Wait for some minutes while the archive is being prepared.

Make Backup Of Images In Your Blogger Blog


Step 6 : Now go to your gmail inbox and check the mail. You will get a download link in it to download your photos archive.

Make Backup Of Images In Your Blogger Blog


Note : The link will be active for around 1 week. So download your archive before it otherwise repeat the process again.

I hope this tutorial helped you to make a backup of your blog's images. If you liked this article then please share it with your friends. 
Read More

Thursday, 16 April 2015

// // Leave a Comment

How To Add a Language Translate Button In Blogger

In our world, there are thousands of languages spoken by different peoples of different countries. Although, majority of people speaks English but there are few peoples who don't know English or they are not fully comfortable with English. Sometimes it also happens with us that we visits a site of other language like Russian, French etc, in that case we translate it into English if it allows us to do so.

How To Add a Language Translate Button In Blogger

In this post, I will show you how you can add a translate button on your blog also. This button helps you to keep those visitors busy who don't know English. It is good way to save some of your traffic and also to increase your regular visitors. Follow this small guide and add this feature to your blog also.

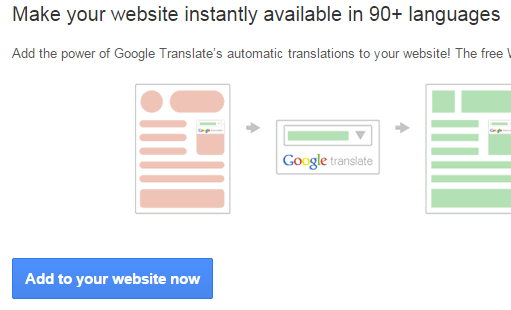
Add Google Language Translate Button On Your Blog

Step 1 : Go to Google Translate Management Page and click 'Add to Your Website Now'.

How To Add a Language Translate Button In Blogger

Step 2 : Now, write the URL of your blog and select the original language of it. Now click 'Next' button. 

How To Add a Language Translate Button In Blogger


Step 3 : Now you can customize the language button for your blog. There are some options like number of languages, in which you can decide to add all languages or specific languages. Also, you can select the button design from vertical, horizontal and drop down. After that click on 'Get Code'.

How To Add a Language Translate Button In Blogger

Step 4 : Now you will get 2 codes as shown below. Copy both the codes in a notepad file separately.
How To Add a Language Translate Button In Blogger

Step 5 : Open your blogger dashbaord. Go to template and edit your template. Now search for </head> in your template and paste the 1st code just above it. Save the template.

Step 6 : Now again go to Blogger>>Layout>>Add a Gadget>>Add HTML/Javacript. Paste the 2nd code in it and save it.

That's all you have to do. You have successfully added language translate button in your blog.

I hope this small guide helped you. But, if you still face any problem than feel free to comment below.


Read More

Tuesday, 14 April 2015

// // Leave a Comment

How To Do Live Blogging In Blogger/Blogspot

Live Blogging is a kind of blogging in which a page is made to give live feeds or updates in real time. It is similar to a news portal which updates their news on regualar basis. You can also compare it with a sports website like a cricket score websites which updates every seconds to give you latest score.

How To Do Live Blogging In Blogger/Blogspot

You can use live blogging according to your need. It is simply a separate page which keeps on updating every second. Here, you will write and the content is uploaded instantly on that page. You don't need to Publish it every time. I am also using it soon on my blog. If you wants to add it on your blog, simply follow these steps given below.

How To Do Live Blogging In Blogger

1. First, go to 24liveblog.com and create a account there. Fill the required details and sign up a account.

How To Do Live Blogging In Blogger/Blogspot


2. After creating the account, go to your dashbaord. Go to events and select 'Create Event'.

How To Do Live Blogging In Blogger/Blogspot


3.  After this you have to fill some information about your live blogging event.

How To Do Live Blogging In Blogger/Blogspot

Title : Write title of your event, you can write anything related to your subject.

Description : Write a small description about your live blogging.

Live Comments : If you want your users to comments on your live blogging, then check the live comments box.

Other options are to just change the look of your live blog, change according to your need. Now click on 'Submit' button.


4. Fill details about your website/blog. 

How To Do Live Blogging In Blogger/Blogspot


5. Now, you will find a HTML code, copy it and paste it into a notepad file. Now click on 'Start your Live Blogging' shown to you.

How To Do Live Blogging In Blogger/Blogspot


6. Now, open your bloggers dashboard, go to Pages and create a new page. Edit the page in HTML form and paste the copied code there. 

How To Do Live Blogging In Blogger/Blogspot


7. Publish the page and you are done. Now to add content to your live blog, you have to log in to your 24liveblog.com account. The content which you will post there will immediately appear on that page in your blog.

I hope this tutorial helped you to enable live blogging feature in your blog. If you have any problem, then feel free to comment below.
Read More