Saturday, 13 August 2016

// // Leave a Comment

How To Write A Guest Post

Guest posting is a creative way of writing new articles on other's websites and blogs. This is an amazing way of sharing your content through other's platform. By writing your post on other, not only their readership will increase, but people will also follow to your own blog through backlinks provided by the host. It will help your blog to get more traffic and more subscribers.

How To Write A Guest Post?


Writing a guest post is not so simple as it sounds. It requires a lots of hard-work because writing a post in your blog is so easy as compared to writing on other's blog. It is not a easy job to get your post selected by the owner of that blog. You have to convince the owner that you are actually providing a good quality content that will help help their readers and help their blog to grow.

Here are some steps which you should follow to write a guest for others.
How To Write A Guest Post ?

1. First thing to write a guest post is to have a list of blogs that are willing to accept guest posts. There is a very simple way to find blogs that are ready to accept guest posts based on your niche.

2. Open Google search engine and look for the following terms - 
  •  "Your topic" + "write for us"
  • "Your topic" + "contribute"
Both of the above will generate a similar results 

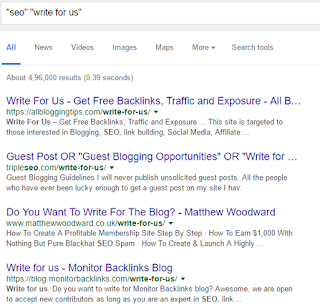
Here is an example how it works - 
How To Write A Guest Post?


A simple google search on the topic 'seo' helped me to find thousands of blogs that are willing to accept my guest post on their blogs.

3. After making the list of few blogs for which you are going to request them, you have to contact their administrator and convince them so that they will agree to post your post on their blog and provide you a few backlinks. 
For this you will be writing a mail to them to describe about yourself. Here is a good way to contact them  - 

Hey (Blogger Name),
I am huge fan of (Blog Name)
And I would love to be your next guest author.
To just give you an idea of the quality I will be bringing to you, here are some of my recent posts:
1. Link 1
2. Link 2
3. Link 3

Here are some ideas I have in my mind :
1. Guest post idea 1
2. Guest post idea 2
3. Guest post idea 3

Let me know what you think.
Keep up the awesome work at (Blog Name)
Regards,
Your Name 

This is a good way of approaching to the web masters. In this way they came to know about your past work and also the ideas which you have for their blogs. Some blogs provide their own format and requirements, so follow according to it in that case.

Some More Tips On Getting Your Guest Post Approved

1. Write your post first before approaching anyone. The blog owner may immediately respond to you and ask for the content and in that case if you don't have it , they may kick you out.

2. Every blog have a different style of writing. So before sending it to them, try to know and write your content in their blog's style.

3. Providing a sample content is very important for some web masters. They will look for your past guest post on other blogs and then only they will decide whether to accept your content or not. It is good to approach low authority blogs first and get some experience to show for the high authority web masters.

4. Writing the content which is relevant to their blog. They are not going to accept it if you are not writing which will help their readers.

5. Don't include your affiliate links without asking their permission. Mostly, they will not allow to add your affiliate links. Only they will provide you a few backlinks. 

6. Don't give the web owner too much of work i.e your post should be completed byline, formatted and all the necessary images also included on your server so that the blog owner can directly post it without doing much efforts.


I hope this post helped you in writing guest posts. If you have any query or something additional to share with me then feel free to post in the comments below.
Thanks For Reading
Read More

Friday, 1 April 2016

// // Leave a Comment

10 Google Tips For Online Safety

The world is getting smaller and smaller because of people doing more online stuffs than before. So, it is very important to be safe and secure while using web. Google is providing you these amazing 10 tips to increase your online safety.


1. Browse without a trail of cookie crumbs

You can go online without leaving the records of the sites you visit or the files you download.

10 Google Tips For Online Safety


In the Chrome menu select 'File' and then 'New Incognito Window'. On the Chrome app, touch the menu icon and then 'New Incognito' tab.

2. Sweep away unwanted software

Use the Chrome Cleanup Tool to sweep your PC of unwanted software.

10 Google Tips For Online Safety


Visit https://www.google.com/chrome/cleanup-tool/ to download the tool. Open up 'chrome_cleanup_tool.exe' and install it on your computer.

3. Debut a fresh password

Protect your account by changing your password regularly.

10 Google Tips For Online Safety


Sign into your Google account, click your profile icon and then 'My Account'.
Under 'Sign in & security' click 'signing in to Google'.
Click 'Password' to change your password.

4. Dust off your privacy settings

Choose the privacy settings that are right for you with a quick Privacy Checkup.

10 Google Tips For Online Safety


Sign into your Google account and click your profile icon and select 'My Account'.
Locate the Privacy Checkup and click 'Get Started' when you are ready to begin. Remember, you can change these settings as often as you like by repeating your checkup.

5. Keep the hackers out by updating your chrome browser

Update your browser to ensure you have the latest and greatest safety features.

10 Google Tips For Online Safety


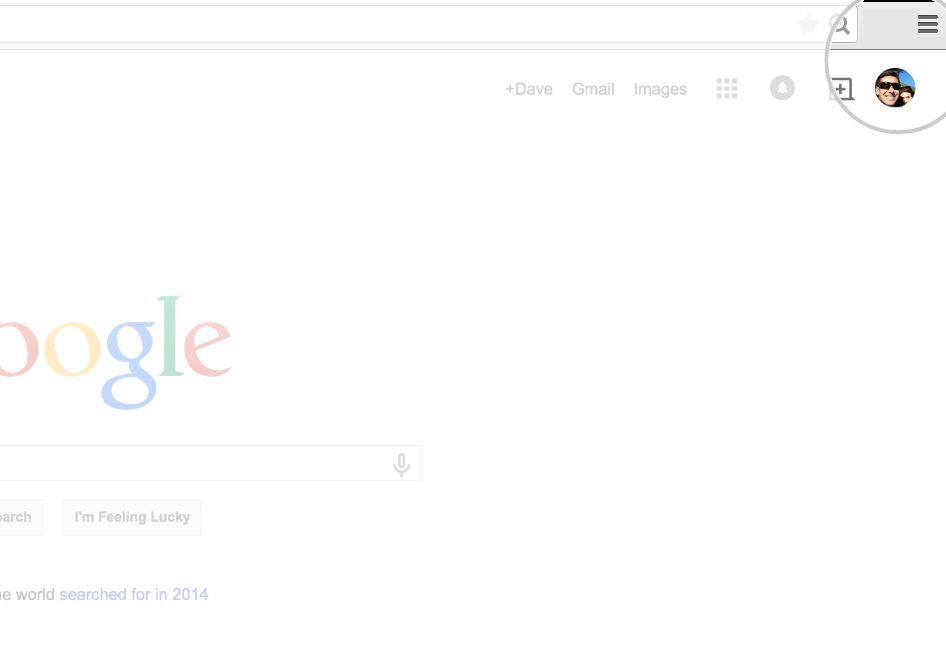
Google Chrome automatically updates to the latest version every time you start it up, so you can get the most up-to-date security protection without any extra work. To double check, open Chrome and access the Chrome menu by clicking on the icon in the top right.
Click on 'About Google Chrome' in the drop down menu. The current version number is the series of number beneath the 'Google Chrome' heading.
Chrome will also check for updates when you're on this page. Click 'Relaunch' to apply any available update. Congratulations, you've just given your browser a clean bill of health!

6. Install a new lock only you can pick

Secure your phone using a PIN, password, pattern or even your face.

10 Google Tips For Online Safety


On Android, open your device's 'Settings' menu and under 'Personal', touch 'Security'.
Under 'Device security' touch, 'Screen lock'.
Touch the screen lock you'd like to use and follow the instructions.

7. Make intruders dance the 2-steps

Add extra account protection with 2-step verification.

10 Google Tips For Online Safety


Sign into your Google account, click your profile icon and then 'My Account'.
Under 'Sign in & security' click 'signing in to Google'.
Click '2-step verification' in the box on the right and then click 'Start setup'.
Follow the step-by-step setup process.

8. Get a security tuneup

Manage your security settings in just a few minutes.

10 Google Tips For Online Safety


Sign into your Google Account, click your profile icon, and select 'My Account'.
Locate the security checkup and click 'Get Started' when you're ready to begin.

9. Say goodbye to viruses

Use Google Drive to scan files for viruses before downloading or sharing.

10 Google Tips For Online Safety


Share or download any file stored in Google drive. If a virus is detected, the action will be blocked and a warning will be displayed.

10. Wipe your device clean, wherever you left it

Remotely lock, locate, ring, or wipe your Android device from wherever you are.

10 Google Tips For Online Safety


Download and install the Android Device Manager app from Google Play. Open the app and sign into your Google account. From a phone, swipe along the bottom of the screen to see and select your devices. From a tablet, touch the arrow next to the device to select it. Android Device Manager will allow you to locate, lock, ring and or wipe your selected device from anywhere.

So those are 10 best tips from Google just to increase your online security. I hope you enjoyed it.

Thanks For Reading!!
Read More

Monday, 15 February 2016

// // Leave a Comment

How To Create a Strong and Secure Password

Most of the people don’t care about their account’s security and passwords. They try to make their passwords as easy as possible so that they can remember it easily in future.  If you are using web for a while, then you must aware about passwords and its importance.  It is very important to make your password strong because there are so many stories available of hackers who have accessed sensitive information of other people and misused that information in one way or the other.

How To Create a Strong and Secure Password


It is necessary for us to follow certain precautions in creating a password for any type of personal account. Below are some useful tips for making a strong password for you.

Use different passwords for different accounts

Studies show that a 75% percent person uses the same passwords for different types of accounts. The password for their Gmail is also the password of their Facebook, Twitter and Paypal account. People uses this thing because they are so lazy in creating different password and using the same seems easy to remember for them. But, this is the biggest mistake and creates a big space for hackers to get into your account. Getting one account hacked means your every account hacked. 

Sometimes, it also happens that you share the password of any of your account which doesn’t contain any sensitive details. But, having the same password for others account too, makes them vulnerable to get hacked easily.

You should avoid using same passwords and secure your personal data from others.

Use password management software

As explained above that it is necessary to make different passwords for different types of account, managing such a long list of passwords is a tedious job for a normal person. The solution to this problem is that you should store all the passwords at a single secured place.

There are so many software available which can be used to store all the usernames and passwords of different websites which can be saved and accessed by a single password. In this way, you not need to remember all the passwords, only one password is sufficient to access all your accounts.

Avoid Patterns

People often use patterns to remember passwords. For example, if they have a password ‘facebook123’ for their facebook account and it is very likely that they will use ‘twitter123’ for twitter and ‘instagram123’ for their Instagram account. In this way all your accounts are on risk because having any of your account hacked makes other account hackable too.

So it is strongly advised that you should avoid using any type of patterns between any 2 passwords.

Change your password frequently

Keeping the same password for a long time increases the chances of someone figuring it out. People usually feel lazy (even me too) in changing their passwords because they have to remember it again.  But, if you change your password on a regular basis, say in every 3 months, then your account will be secured from hackers because it is almost impossible to find new password each time you change it. Also, the accounts which may be already hacked can get recovered by changing password frequently.

Avoid common passwords

Anything which can be related to you can be said as a common password. Common passwords can be your birthplace, your date, your pet’s name and many more. If you are using passwords like ‘12345’ or ‘qwerty’ (see in your keyboard) then your account may be on a risk.

Make Strong Security Question

People generally don’t care about security question which is required to recover a forgotten password and this is the biggest advantage to hackers. Having a little personal information, one can easily hack your account. 

Most of the time it is not your fault because the security questions are provided by websites only and they are so easy questions like what is your mother’s maiden name? , Your birthplace name, your pets name etc.  Hackers try these questions and it is very easy to answer these questions because they can be easily known to anyone.

The best solution for this problem is that you should give a wrong answer to these questions. There can be only 1 correct answer for a question but there is infinite number of wrong answer for the same question. So you have to use this technique to protect your account. Just select any of the security questions and give a wrong answer to it. Giving a irrelevant answers is even better. For example, suppose the security question is ‘what is name of your best friend?’ and my answer is ‘fingers’ which is not related to it. It is almost impossible for anyone to figure out it.

Make a Strong Password

After every possible step taken to protect your account, it is necessary to create a very strong password for your account. Following are some simple tips which will help you in creating a strong and secure password.
  • Make a password of at least 10 characters. Less than this is not considered as a strong password
  • No matters how long your password is, if it is in English dictionary then it is not a strong password
  • Always try to include both numbers and alphabets in your password
  • Use a randomly typed password i.e., type 15 to 20 characters randomly on your keyboard and use it as your password
  • Make password from your own life, for example, ‘My children’s name are Michael, David, Steven and Mitchell’ will make my base password as ‘midastmi’
  • Including numbers in the above password will make them even stronger like here I added their ages also. So password becomes ‘mi12da25st15mi8’.
  • You can further include special characters to make it more secure.For example, mi#12da#25st#15mi#8

These are some of the simple and useful tips in protecting your account and its personal data from the hackers. I hope you liked it. Don’t forget to share this with your friends and comment your personal views in the comments below. 
Thanks for reading 


Read More

Tuesday, 2 February 2016

// // Leave a Comment

How To Protect Your Online Content From Thieves

As you all know, that writing and posting valuable content for your website or blog takes a lot of time and hard-work. All the efforts in creating a fresh and valuable content for your blog gets copied or stolen by thieves by just few clicks. Your content is your most important asset and you can't allow anyone to come and copy it somewhere else.

How To Protect Your Online Content From Thieves


Protecting your content from such thieves is the duty of every webmaster. It is not easy to look for each and every post of your site but you must do some hard-work to protect your blog's content as much as possible. In this post, I am going to tell you some methods by which you can protect your online content.

Disable Right Click

This is the very simple and most useful tip in preventing online content. Most people don't copy your content by typing line by line,  rather they just select and copy the content into their page. By disabling right click of mouse on your web pages, people can't select and copy the content. This is the best way to protect your work from thieves.

How To Protect Your Online Content From Thieves

Disable Right Click In Blogger

It is very easy to disable right click in blogger blog. Just follow these simple steps given below.

1. Login to your blogger's account.
2. Open your blogger dashboard and go to layout menu. Add a new gadget HTML/Javascript.
3. Copy and paste the following code into it. 
<!--MBW Code--><script language='JavaScript1.2'>function disableselect(e){return false}function reEnable(){return true}document.onselectstart=new Function ("return false")if (window.sidebar){document.onmousedown=disableselectdocument.onclick=reEnable}</script><!--Code End http://mybloggersworld.blogspot.in>

4. Save the gadget.

Now, you will see that the right click is disabled on your blog. 

Disable Right Click In Wordpress

It is much easier to disable right click on a wordpress blog than a blogger blog. There are so many plugins available for a wordpress user. Click here and install this plugin on your blog to use this feature on it.

Add Watermarks and Copyright notice

Copyright notices are the 2-3 lines of text which shows or tells the readers that the written post belongs to you and copying some or whole of it is against laws. These notices works great because by seeing such notice they will fear that they are breaking a law. Also, it don't take too much of time in adding such copyright notices with your post. 

How To Protect Your Online Content From Thieves


In similar way, you can also protect the pictures of your websites by adding a watermark. Adding a watermark makes the picture completely belongs to you and your site. People usually don't copy such pictures because using those pictures with your watermark will be awkward for them also.

Sometimes it also happen that people are not aware about copyright issues. They simply copy the content and not aware that they are stealing something. By using watermarks and copyright notices, you can avoid those people from copying your content.

Set Google Alerts

Protecting your content is one thing and catching the thieves who already copied your content is another important thing. After using all the necessary measures, there is always a chance of your content getting stolen by others. Google Alerts is a way to catch those people who are using your original content.

How To Protect Your Online Content From Thieves


Whenever someone copy and post your content, you will get a alert. To get an alert, you first copy few lines of your post and creates alerts to be notified when this content appear online. Creating multiple alerts for the same post works best. Also, it is better to set alert from the first paragraph because people usually copy first paragraph more than the rest.

By knowing who has copied your content, you can check whether they provided a link to your site or not. 

If your content is already copied ?

The above methods are the best measures to protect your content from thieves but, what about the content which may have already stolen by someone. How to know whether your post is republished at any other place and if yes, how to find it ?

The answer of above question falls in this section. Here, I am going to show tell you about the 2 best tool to search your content on the web.

Search Your Content

There are so many tools available to conduct a search of the web for any content given by you. One of such tool is Copyscape. Copyscape is a website on which you can put the URL of your post and then it searches the web for a web page containing the same content as in your link. It will tell you whether your content is safe or stolen by some thief.

How To Protect Your Online Content From Thieves


Search Your Images Using Reverse Image Search

Like text, you can also search for images. If you have a particular image and you want to know if there is any copy of it on the web, then you can use a reverse image search tool. In this kind of tool, you simply have to upload the image (no matters what name you have given to it), then it will search web to find out its exact copy and show you the results. If that image is not stolen then it will only show your website in the result.

How To Protect Your Online Content From Thieves


Google Images is the best tool for this purpose. Click here to try it.

How to deal with theft ?

After doing so much of hard-work to secure your content there is always chances of getting your work copied. Whenever you came to know that your content is copied, your next step is to contact that website owner and discuss the matter. 

Prepare your evidence

It is important to prepare your evidence first before contacting the person because there is no proof that he copied your content from your website. You should be ready with proper proof that you were the first to publish that content online.

If your content is indexed on Google then you can show that date as a proof because you posted that content earlier than someone else.

Contact the Thief

After creating all the necessary evidences, its time to talk to that person. First, you should send a friendly message telling the person that he copied his content. You can decide whether you want that content to be removed from that site or you want a back link to your site indicating that you are the first one to publish that article.

In most of the cases, the blog owner will remove the content and your blog's content and ranking will be saved. If you get a negative reply to your friendly message or the blog owner not giving any reply then you can follow the next step.

Contact hosting provider

Now, its time to become serious and punish that person. You should contact their hosting provider and tell them what this website owner done to you. Here, you have to show your evidences and prove them that you are owner of that content. 

After this, their hosting provider will force him to remove that content and it is also possible that they will permanently remove his account. I am sure that till here your problem will get solved but if still you are struggling, then move to the last and most important step to remove that stolen content.

File DMCA Complaint

DMCA stands for Digital Millennium Copyright Act. You can submit a complaint to DMCA to tell them to deindex content which was stolen from your website. This is a very quick process and the stolen content will get removed within a short period of time. 

DMCA also provides you so many useful tools to protect your online content.  


These are some of the ways by which you can protect your online content. I hope you liked it.

Now its time to share your thoughts with me and the others.

Thanks for reading and don't forget to share it with others.


Read More

Monday, 25 January 2016

// // Leave a Comment

How To Turn On And Turn Off Subtitles In VLC Media Player

Today, VLC is the best and most used media player in the world. People like to run their videos in this media player because it supports almost all the formats. It is very easy to use and you not need any skills to use it. VLC is available for both Windows and MAC.

How To Turn On And Turn Off Subtitles In VLC Media Player


One of its amazing features is the capability to run subtitles. Subtitles is used to show the audio in text format in some other language to make the clip understandable to people of different origins.
Sometimes it is useful for one person and annoying for other. In this post, I will show you methods by which you can turn on and turn off subtitles in VLC media player as per your needs.

Turn On Subtitles In VLC Media Player

Step 1 : Subtitles can be added to a video with the help of a .srt file. To run subtitles in a specific video, you need its srt file.You can easily download the srt file for a movie from the internet. Its size is very small.

Step 2 : Open the video file in VLC. Go to Video>>Subtitles Track>>Load file.

How To Turn On And Turn Off Subtitles In VLC Media Player


Step 3 : Now, look for the saved srt file and open it. That's it. Now you can see subtitles below your video.
How To Turn On And Turn Off Subtitles In VLC Media Player


Turn Off Subtitles In VLC Media Player

Method 1

Step 1 : Open the desired video file in VLC.

Step 2 : Go to Video>>Subtitle track >> Disable.

How To Turn On And Turn Off Subtitles In VLC Media Player

Now, you will not see any subtitles.

Method 2

If first method don't works for your video, then you can use this alternate method.

Step 1 : Launch VLC media player and run the desired video file in it.

Step 2 : Go to Tools>>Preferences>>Subtitles & OSD.

How To Turn On And Turn Off Subtitles In VLC Media Player


Step 3 : Uncheck all the option like enable OSD, enable subtitles etc.

  Congrats !! You are done with it. You have successfully removed subtitles from your video.

This was a very simple guide on turning on and off subtitles in VLC media player. I hope you liked it.
Thanks For Reading


Read More
// // Leave a Comment

Widget To Show Total Number of Post and Comment In Blogger

Number of post and comments are the 2 things which tells the success of any blog. More comment your blog gets, more the trust builds among readers and the rank and traffic improves. Also, a successful blogger writes new post consistently. So it also have a good number of articles.

Widget To Show Total Number of Post and Comment In Blogger

In this post, I am going to tell you about a widget by which you can show total number of posts and comments on your blog to you audience. If you have a good number of post and comments, then it will create a good impression about your blog towards new readers.

Widget To Show Total Number of Post and Comment In Your Blog

Step 1 : Open your blogger's dashboard. Go to Layout>>Add a widget >> HTML/Javascript.

Step 2 : Copy and paste the following below code into it.

             <script>function mbhTotalCount(json) {document.write(parseInt(json.feed.openSearch$totalResults.$t,10));}</script><div style="font: 25px Georgia;">
Total Published Posts: <script src="http://www.myonlinedestination.com/feeds/posts/default?alt=json-in-script&amp;callback=mbhTotalCount"></script></div>
<div style="font: 25px Georgia;">
Total Number Of Comments: <script src="http://www.myonlinedestination.com/feeds/comments/default?alt=json-in-script&amp;callback=mbhTotalCount"></script></div>

Step 3 : Replace myonlinedestination with your blog's url.

Step 4 : Save the widget. 

That's it. You have successfully added that widget to your blog. Now, your blog will show total number of posts and comments till date to your readers.

I hope this small guide helped you in adding this widget on your blog. If you have queries, then feel free to ask in the comments below or you can email me also.

Thanks for reading.

Read More

Sunday, 15 November 2015

// // Leave a Comment

How To Place AdSense Ad Just Below The First Paragrapgh ?

AdSense is the great source of earning money from a blog but there seems to be a major impact on earning due to the placement of ads on different places in the blog. Bloggers keeps on trying different techniques to get more clicks on their ads. You can try many places like headers, inside blog post, bottom of the post, sidebars etc. One of the best place to get more clicks is to put AdSense ad below the first paragraph of your post.

How To Place AdSense Ad Just Below The First Paragrapgh ?


It is not possible to directly put AdSense ad below the first paragraph. You have to make certain changes to avail this feature in your blog. In this post, I will guide you step by step to use this thing on your blog too. Just follow the below steps carefully.

Place AdSense Ad Just Below The First Paragraph

Step 1 : Open your blogger dashbaord. Go to Template  and edit the template in HTML form.

Step 2 : Search for <data:post.body/> using Ctrl+F. You may find it more than once, just stick to the second occurrence.

Step 3 : Now, replace it with the following given code.
             <div id='target'><data:post.body/></div>

Step 4 : Copy and paste the following code just below it.
              <script type='text/javascript'>
function insertAfter(addition,target) {
var parent = target.parentNode;
if (parent.lastChild == target) {
parent.appendChild(addition);
} else {
parent.insertBefore(addition,target.nextSibling);
}
}
var adscont = document.getElementById(&quot;content&quot;);
var target = document.getElementById(&quot;target&quot;);
var linebreak = target.getElementsByTagName(&quot;br&quot;);
if (linebreak.length &gt; 0){
insertAfter(adscont,linebreak[0]);


Step 5 : Add this code above the code given in step 3.
             <b:if cond=’data:blog.pageType == &quot;item&quot;’>
<div id='content'>
Adsense code placing center
</div>
</b:if> 

Step 6 : Replace the red text with your AdSense ad code.

Step 7 : Save the template and that's it. You are done.

Congrats !! You have successfully added the AdSense ad below the first paragrapgh of your every post.

I hope you liked this guide on adding AdSense ad below the first paragraph. If you faced any problem or have any confusion in any of the above steps then feel free to ask in the comments below. I will be happy to help you.
Thanks for reading


Read More

Thursday, 22 October 2015

// // Leave a Comment

How To Make Money From YouTube Videos

You must have heard many stories of making money from YouTube videos. Yes, it is actually possible to earn money from your personal videos. It can be of anything which you like as long as it follows YouTube policy. You can earn anything from a few bucks to millions, depending upon your audience. In this post, I will explain you every step required in this process.


How To Make Money From YouTube Videos


How to Make Money From YouTube Videos ?

Build a YouTube Channel

Your channel is your personal presence on YouTube. Each YouTube account has one channel attached to it. A YouTube account is the same as a Google account, and creating a YouTube account will grant you access to other Google products, such as Gmail and Drive.

Create your account or use your existing one. Add keywords to help people find your channel. You can add keywords by navigating to the Advanced section of your Channel Settings. Make sure that your keywords are relevant to your content.

Your user name can also work for or against you. If it’s short, easy to remember, and original, people will be more apt to remember you. However if you are using an existing account, just stay with it. It doesn't help if you keep changing accounts.

Add Content

Try to upload content that is high quality, and isn't super long. (This option can vary depending on what type of content you decide to upload) Also try to upload regularly and stay consistent with your uploads.

Even if your content isn't great at first, keep at it. Practice makes perfect. Try to make each video better than the last. You will often learn as you go. Improve your content by either using a better camera or trying better editing software or techniques. Also try to improve the way things are filmed. Use a tripod, have a friend help you or light your scenes better. It all helps for a better end product which in turn helps you get a better audience.

By uploading regularly you can help hold an audience. People are more likely to subscribe if you add content on regular schedule, and maintain that schedule as much as possible. Make sure to tag your videos with key words that describe the content, as well as an eye-catching description. These will help drive people to your video from YouTube searches.

Gain Audience

Building an audience is key to increasing your monetization. You need people to watch your ads in order to make any money off of them. There is no one secret to getting more subscribers, just make the best content that you can and they will come to you.

Keep uploading content and try to get people hooked. Send your video out on Twitter and Facebook. Share it with people. Distribute it elsewhere on the internet. Subscribers are essential to becoming a partner.

Interact with your viewers by responding to comments and making occasional videos directly related to viewer comments and questions. Connecting with your community will bring more members into that community.

Monetize your videos

In order to start earning money on your videos, you’ll need to enable monetization. This means you are allowing YouTube to place ads in your video. This also means that you acknowledge that there is no copyrighted material in your video.
You can monetize a video as it uploads by clicking the Monetization tab and checking the “Monetize with Ads” box.

You can setup Google AdSense for free at the AdSense website. Click the Sign Up Now button to begin creating your account. You must be 18 years or older to create your own account. If you are younger than that, you will need an adult to help you.

Market your videos

Don't put your videos just on YouTube! Start a blog, make a website or post them on other video or social media sites. The more views it gets, the better. By sharing the link or embedding the video on the internet, you are increasing the chance of it getting noticed and of you making money.

I hope you liked this guide on money making from YouTube videos. It's time to share this with your friends also.
Read More

Tuesday, 22 September 2015

// // Leave a Comment

10 Ways to Increase The Security Of Your Gmail Account

Gmail is the best email service provider till today and why not because its creator is Google, the name which is very common to everyone.Although, Google makes every possible steps towards protecting your account but there are still certain gaps through which hackers, phishers and scammers enters.

10 Ways to Increase The Security Of Your Gmail Account


Gmail has been forging its security measures by adding new security features but many of us are not aware of it. In this post, I will tell you some technical tips by which you can increase the security level of your account. These tips are very easy to implement. Go through the whole guide and you will be protecting your Gmail with a much more security.

9 Ways to Increase the Security Of Your Gmail Account

1. 2-Step Verification

Google introduced this feature to make the security level of your Gmail account to a much higher level. After enabling this feature on your account, every time when you try to log in, you need to enter a code that is sent to your registered mobile number. So nobody can access your account with your password only. Without having your phone, it impossible to hack your account.

It is very easy to enable 2-Step Verification on your account. Click here to go to the setting page and follow the simple instructions and that's all.

You can also create a backup phone number and printable backup codes as an alternative if you loose your phone. 

2. Check Granted Account Access

The very important thing you should check to see if there is any suspicious activities happening in your account is your granted account access settings. If a hacker has a chance to get into your account, he will most probably add his own fake email for easier future access. 

So how can he do it ? He just has to hack your account and then click on Settings > Account and Import > Grant access to your account and they add their fake email address. Now, you knows everything, its your turn to go through the above steps and instead of adding a new email, you have to check is there any unwanted email on that list. Remove the email if you find it.

3. Check Your Filter, Forwading and POP/IMAP

The account is hacked when the user has his account signed on and he went to visit a bad site. The site has a backdoor to extract information from your Gmail account, and the backdoor is the Filter. Filters can transfer emails as long as the user has filter in his account.

Therefore, it is recommended to remove suspicious filters from your account to protect it from these bad sites.

4. Enable HTTPS Security

When it comes accessing your account in public wireless or non-encrypted networks, HTTPS could mean your security. Leaving this feature disabled will make easier for hacker to crack a path into your Gmail account. 

To enable this feature, go to Settings > General > Browser Connection and check the option "Always use HTTPS". Don't forget to Save changes.
By doing this, your account is protected by a secure protocol that provides authenticated and encrypted communication. 

5. Revoke Unauthorized Access

You have seen many times that to access a certain app, you are required to give access it to your Facebook account. Same thing also happens with the Gmail. To use those websites and applications you are required to give access to your Google account.

Many users are not aware of this security hole because it asks to access your Google account not Gmail account. This is one of the most useful trick hackers uses to hack a Gmail account.

Click here to see for how many sites you have granted this access. You can simply remove any site if you find any suspicious or unused site in that list.

6. Track Your Account Activity

One of the best method to know if your account is hacked or not is to check your account's activity. It is very easy to check your account activity and you can easily came to know about all the previous login and location of login on your account. 

Sign in to your account and in the bottom part of your mail, you will see a message "Last account activity : (xyz) minutes ago" click on the details and you will see access type, Location and date that you have signed into your Gmail in the past few days.

7. Adopt Browser Plugins

After doing so many efforts to protect your account, there are still so many expert hackers who can still have the skills to get into your account. To overcome this situation, we can apply browser plugins to your browser to increase the security level in your web pages. These plugins can check and warn you that you are trying to access a phishing and also it removes the unwanted threats.

Web of Trust is one of those amazing plugins which warns you when you access a bad site. It will inform you that you are visiting a website with a poor reputation. It is available in all major browsers.

8. Enhance Security Question-Answer

Hackers love to hack a account through mail recovery security questions rather than confronting your strong passwords. This is quite reasonable as most of the sites teaches you to create a strong password but never teach you to create a strong security question.

Here, you can do a simple trick. Make a question and give a wrong answer to it. For example, let's say your question is "Who is your best friend" then you can put the answer as "teeth". Make it as nonsensical as possible but make a answer which is memorable to you.

9. Make a Strong Password

Your password is the most important guard of your account. So, it is very important to make your password as strong as possible. 

You should avoid choosing easy passwords just to make it easily memorable. You should avoid simple passwords like "iloveyou", "password", "123456789", "1q2w3e4r" etc. 

Let's say you want to choose the password "Iwasbornin 1996", it is a very easy password. Instead of this you can choose "Iwbi1996". It is shorter than previous one but it is still more strong than it.
To make it further strong you can insert a special character after every 1 or 2 alphabets like "Iw@bi@19@96. 
Otherwise, to be in a more safe zone, you can use randomly typed 20 characters password and memorize it.

10. Never Trust Anyone

It may happen that the account of your relative or friend is hacked and the hacker now wants to hack your account also. So, he will send you email on the behalf of your relative and by sending spam mails, they will try to get into your account.


So these are among the best tips to save your Gmail account from hackers, phishers and spammers. There is no 100% guaranteed tip to protect your account but after using these above tips, the chances of your account getting hacked will be greatly decreased. I hope you liked this guide on ways to protect your Gmail account from getting hacked. 

Thanks for reading and share this guide with your friends also so that they can benefit from it.


Read More

Thursday, 10 September 2015

// // Leave a Comment

How To Add Search Description To Individual Post In Blogger

SEO is the most important part of any post and when done correctly, it rewards you with tons of traffic. One of the important part of SEO is meta description or tags. Adding search description to individual post is very useful to rank higher and faster. A clear and brief search description helps your post to get more number of clicks.

How To Add Search Description To Individual Post In Blogger


In this post, I will show you how to add a search description or meta tags to a specific post in blogger. First we have to enable search description from bloggers account settings and then we will we able to add search description to our individual posts. Follow the simple steps given below carefully.

Add Search Description To Individual Post In Blogger

Step 1 : Open your blogger's dashbaord. Go to Settings > Search Preferences > Meta Tags.
Enable the description setting and Save it.

How To Add Search Description To Individual Post In Blogger

Step 2 : Now, write a new post or edit the previous one. You will see a new 'Search Description' button at the right side of the page as shown below.

How To Add Search Description To Individual Post In Blogger

Step 3 : Click on it and write a brief description of your post and click on 'Done'. Don't use more than 150 words.
How To Add Search Description To Individual Post In Blogger

Publish the post and that's it. You have successfully added the search description to your post.

This was a very simple tutorial on adding search description in individual post in blogger blog. I hope you liked it. If you have any problem related to this then don't hesitate to ask me. I will be happy to help you.
Read More

Monday, 7 September 2015

// // Leave a Comment

How To Find Best Coupons Code Available Automatically

Coupons code are getting very common these days. People always look for a good discount whenever they are doing shopping online on Amazon, Flipkart, Snapdeal, Ebay etc or buying a domain and hosting from GoDaddy, Bluehost, Namecheap etc.

How To Find Best Coupons Code Available Automatically


There are so many coupons available online and when you search them, you get plenty of choices to select. But the problem here is that each time you have to look for a coupon, check it whether it is working or not and if it works then also you are not sure that whether it is the best one or not. So in that case many people keep searching for much longer time period.

In this post, I will give you a amazing trick by which you don't have to do any task to get the best coupon available for that particular deal. You will get the best deal available automatically and you will definitely amazed to see that how fast this process goes.

Find Best Coupons Code Available Automatically With a Single Click

Step 1 : Go to Join Honey and download and install their extension as shown below.

How To Find Best Coupons Code Available Automatically

Step 2 : Now it will ask you to sign up. Just enter your email address and create a password.
How To Find Best Coupons Code Available Automatically


Step 3 : Now, your task is over. Here I will give you an example of how it actually works. 

Here, I am going to buy a domain and hosting from GoDaddy.

How To Find Best Coupons Code Available Automatically

As you can see the price of this domain is Rs 611 without use of any promo code. Now, click on Honey button in the top right corner of your browser. Click on 'Try Codes' button as shown below.
How To Find Best Coupons Code Available Automatically
Wait for few seconds while it applies the best coupon available out of these codes.

How To Find Best Coupons Code Available Automatically

 After checking all the available 20 codes, it will apply the best one out of those automatically.

How To Find Best Coupons Code Available Automatically


Now it will tell you how much money it saved for you. In my case it is Rs 512.

How To Find Best Coupons Code Available Automatically

As you can see in the below picture, the price of the domain which originally was Rs 611 is now reduced to only Rs 99. The price is reduced by 83%. Can you believe that you just saved Rs 512 with just a single click. 

How To Find Best Coupons Code Available Automatically


This simply trick helps you to save a decent amount of money on other stores also. You can use it on Amazon, Ebay, Flipkart and many more. Now, you don't have to waste time and effort in searching a coupon code. This trick is just very very useful for everyone. Don't forget to include this extension when you formats your computer or changes the browser.

I hope you liked this guide on finding the best coupons code available automatically. If you have any queries or faced any problem in using this trick then feel free to ask in the comments below. You can also send me Email. I will be pleased to help you. 
Thanks for reading and don't forget to share this amazing thing with your friends too.
Read More

Thursday, 3 September 2015

// // Leave a Comment

How To Share Any Type of File Without Uploading To a Host

Each time when you wants to share a picture, video or any other kind of file with your friend or relative, you uploads it at any other host and then the receiver downloads it from that server from a link provided by you. I think almost everyone will be aware of this process. But, what if I say that you can skip the uploading part in this process and allow your friend to directly download the file right from your laptop or computer.

How To Share Any Type of File Without Uploading To a Host

It is actually possible to do so. In this post, I will show you a very simple method by which you can perform this task of sharing any file directly without uploading it onto a host or server. You can share any kind of file with this method. Your computer will act like a server and your friend will be downloading directly from your computer. The downloading speed will depend on your and the receivers internet speed.

Follow the simple steps given below and start sharing files with other.

Share Any Type of File Without Uploading To Any Host

Step 1 : Go to https://www.justbeamit.com.

How To Share Any Type of File Without Uploading To a Host


Step 2 : Now, click on the parachute and select the file to be shared. You can also drag your file there.

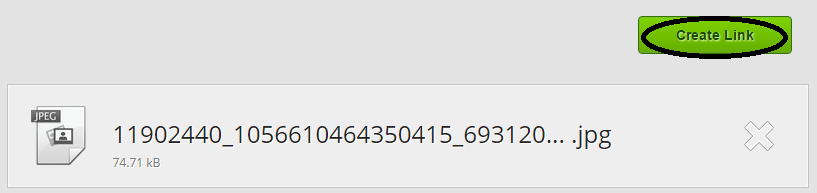
Step 3 : Click on Create Link button to get the downloading link. Wait for few seconds before it completes its process.

How To Share Any Type of File Without Uploading To a Host


Step 4 : Now, you will see a link like shown below. Copy the link and send it to the recipient to download the file.

How To Share Any Type of File Without Uploading To a Host


Step 5 : The recipient can now download the file opening the link in his browser and clicking the download icon as shown in the picture below.

How To Share Any Type of File Without Uploading To a Host


Points To be Remembered -

1. This link will work only 1 time. If you want to share the file with more than 1 person, then create a new link for each new receiver.
2. Do not close your browser while the other person is still downloading the file. Closing your browser will cancel the downloading.

I hope that you liked this post and the information will be helpful to you. Don't forget to share this amazing trick with your friends also. If you faced any problem then feel free to ask me in the comments below or you can also send me an email. 
Read More

Monday, 31 August 2015

// // Leave a Comment

How To Share Your Post To All Facebook Friends And Groups With a Single Click

When you write a new post, the next important task is to share your work with the world. The most important tool which almost everyone uses is Facebook. Sharing new post on Facebook groups and with your friends gives you lot of traffic.

This task seems to be easy but in reality, it takes too much time. Each time you need to open a group, then paste your link manually inside it. This is a very slow process and if want to share your post in atleast 50 groups, then you have invest around 1-2 hours in this task.

How To Share Your Post To All Facebook Friends And Groups With a Single Click


Today, In this post, I will show you a very smart way of sharing a new post with Facebook friends and groups. Using this method you will be able to do this work in less than 5 minutes. Follow the steps given below carefully.

Share Your Post To All Facebook Friends/Groups With a Single Click

Step 1 : Go to Share This and register a new account.

Step 2 : Select the platform on which your blog is hosted. Customize the sharing options of the widget and don't forgot to add Facebook Send button on it.

Step 3 : After completing all the steps, you will get a HTML code. Copy the code and paste it into a new widget in your blog.

Step 4 : Now below your every post, you will see a set of sharing buttons on different social media. Now, click at the Facebook Send button.
How To Share Your Post To All Facebook Friends And Groups With a Single Click


Step 5 : Now, add many as recipients as you want. You can add your friends and groups on which you want to share it. It will not take more than 5 minutes in doing this work. Click on send button and your content will be shared with everyone.

How To Share Your Post To All Facebook Friends And Groups With a Single Click


I hope you liked this tutorial on sharing new post in all Facebook groups with just a single click. If you have any query then don't hesitate to ask in the comments below or you can also contact me on Facebook or G-mail. Also, share this trick with your friends too.
Read More